레이블이 ansible인 게시물을 표시합니다. 모든 게시물 표시

2019년 6월 14일 금요일

[Ansible] Distro List

- 2 개의 댓글
오~오~ 랜만입니다. :)
아주 간단한 업데이트를 하려고요.

앤서블 2.8.0 버전 기준에서의 OS를 구분할때 사용되는 리스트 입니다~!

[vagrant@ansible-svr4nxos distro]$ ansible --version
ansible 2.8.0
  config file = /etc/ansible/ansible.cfg
  configured module search path = [u'/home/vagrant/.ansible/plugins/modules', u'/usr/share/ansible/plugins/modules']
  ansible python module location = /usr/lib/python2.7/site-packages/ansible
  executable location = /usr/bin/ansible
  python version = 2.7.5 (default, Oct 30 2018, 23:45:53) [GCC 4.8.5 20150623 (Red Hat 4.8.5-36)]

Location:
 - /usr/lib/python2.7/site-packages/ansible/module_utils/distro/_distro.py

 177 def id():
 178     """
 179     Return the distro ID of the current distribution, as a
 180     machine-readable string.
 181
 182     For a number of OS distributions, the returned distro ID value is
 183     *reliable*, in the sense that it is documented and that it does not change
 184     across releases of the distribution.
 185
 186     This package maintains the following reliable distro ID values:
 187
 188     ==============  =========================================
 189     Distro ID       Distribution
 190     ==============  =========================================
 191     "ubuntu"        Ubuntu
 192     "debian"        Debian
 193     "rhel"          RedHat Enterprise Linux
 194     "centos"        CentOS
 195     "fedora"        Fedora
 196     "sles"          SUSE Linux Enterprise Server
 197     "opensuse"      openSUSE
 198     "amazon"        Amazon Linux
 199     "arch"          Arch Linux
 200     "cloudlinux"    CloudLinux OS
 201     "exherbo"       Exherbo Linux
 202     "gentoo"        GenToo Linux
 203     "ibm_powerkvm"  IBM PowerKVM
 204     "kvmibm"        KVM for IBM z Systems
 205     "linuxmint"     Linux Mint
 206     "mageia"        Mageia
 207     "mandriva"      Mandriva Linux
 208     "parallels"     Parallels
 209     "pidora"        Pidora
 210     "raspbian"      Raspbian
 211     "oracle"        Oracle Linux (and Oracle Enterprise Linux)
 212     "scientific"    Scientific Linux
 213     "slackware"     Slackware
 214     "xenserver"     XenServer
 215     "openbsd"       OpenBSD
 216     "netbsd"        NetBSD
 217     "freebsd"       FreeBSD
 218     ==============  =========================================


Windows는 있긴 한데...예제가 없습니다. windows의 facts를 수집해 보고 해당 값을 넣어 일일히 테스트해 봐야 합니다.

windows facts를 찾는건 아래의 내용을 참고하세요
https://stackoverflow.com/questions/38962577/ansible-get-facts-from-remote-windows-hosts

Location:
 - /usr/lib/python2.7/site-packages/ansible/modules/windows/setup.ps1

202     $ansible_facts += @{
203         ansible_distribution = $win32_os.Caption
204         ansible_distribution_version = $osversion.Version.ToString()
205         ansible_distribution_major_version = $osversion.Version.Major.ToString()
206         ansible_os_family = "Windows"
207         ansible_os_name = ($win32_os.Name.Split('|')[0]).Trim()
208         ansible_os_product_type = $product_type
209     }
210 } 
[Continue reading...]

2018년 11월 7일 수요일

[Ansible] ansible-vault로 생성한 암호화 파일을 ansible-vault의 키로 사용할 수 없음

- 0 개의 댓글
안녕하세요 


앤서블 심화 과정의 강의 중에 발견된 이슈에 대해서 간단하게 요약하고 work-around에 가까운 해결책을 공유합니다. (Andrew님이 알려주신 이슈)
해당 이슈는 앤서블 버전 2.5.0a1 이후로 모두 발견됩니다. 

#1 생성한 AES256 암호화 파일을 ansible-vault에서 볼트 암호화 파일로 인식하지 못하게 하기

#1-1 우선 알고 계시는 방법으로 vault_key를 생성합니다.
[vagrant@ansible-server ~]$ ansible-vault create ~/.ansible/vault_key
New Vault password:
Confirm New Vault password:
0L, 0C written
[vagrant@ansible-server ~]$ cat ~/.ansible/vault_key
$ANSIBLE_VAULT;1.1;AES256
34613235653831373135356463663939353438633731356666363961663338366433613833663235
6632336534323665393132646432633338373738303661610a636564656134356136363833663230
65353539323437636266373933646565613961636136656131346565666237393735303562356330
6261333337356137320a353466656237373837613933613038373637613539363461353061366361
3039

#1-2 여기서 $(달러 기호)를 삭제 합니다.
[vagrant@ansible-server ~]$ cat .ansible/vault_key
ANSIBLE_VAULT;1.1;AES256
34613235653831373135356463663939353438633731356666363961663338366433613833663235
6632336534323665393132646432633338373738303661610a636564656134356136363833663230
65353539323437636266373933646565613961636136656131346565666237393735303562356330
6261333337356137320a353466656237373837613933613038373637613539363461353061366361
3039

#1-3 그런 이후에 는 vault_key를 평문으로 인식하고 진행이 됩니다.
[vagrant@ansible-server ~]$  ansible-vault encrypt ./group_vars/nodes --vault-password-file ~/.ansible/vault_key
Encryption successful
[vagrant@ansible-server ~]$  ansible-vault decrypt ./group_vars/nodes --vault-password-file ~/.ansible/vault_key
Decryption successful


#2 볼트가 아닌 openssl을 이용하여 난수로 작성된 vault_key를 생성합니다.

#2-1 아래의 명령어를 실행하여 vault_key_by_ssl 이라는 vault_key파일을 생성합니다.
[vagrant@ansible-server ~]$ openssl rand -base64 2048 > ~/.ansible/vault_key_by_ssl

#2-2 처음 보는 거니까, 내용을 살펴 봅니다.
[vagrant@ansible-server ~]$ cat ~/.ansible/vault_key_by_ssl
R4kTxBUg3daBqsL9Ouu6Fl9RPOTv8Gpi+w7hFN9Jd+6o+U0sCs4cKqnFnUDYTil3
EgZotHewfSw8Gax/L7dDC7rPb0VNn4xJFikcbEgmTKI8M+3H4hAuNgrf5SnAFT/J
lw50QsGMr+ZhGgcyBoPX9oGBzUV6DRJisk5+jILqD2SBmI2m8zTh/csCg1HUSC8W
IUh1IArHcFDxznoM0ttTG1I7cC1S5Mzdlc8FAGHluZGXXl1L6YjRRLJFoKJerIT9
dpEtiG05jBb2PNdtq4vTWrJRc9tHMt31EJ2aR2rINLdB23gUGM+5Obnhw3uarXnx
DO5YRTnSB2eZX1VmXgFHB47yxFtesexkYA+4qqglM5lsLB6p5jgBSGqcqkyD2QEo
Bud8PaGaege5l3WSQgRYOHSmm6euzwpanuQHx6N0zzJw4TIulyCdaB/rbmoI7mx8
KWNwqryEzaq8shOuZIIlAVqelR0W4Dccngq5744mCsw0+5TRezuq4kR8+UNaQH67
GRhPYzkJCkWmaBCENH4ewtBpTQBbr2ORejzmkPPLhynegGh+jN4tz77M6YkFIC/O
x3Go+BlGyhHQC1g3NVMAX/NqWljf6fAZlRVNz7ss7gWSo65rZFguaC70Gf0/lC1I
sWrxh3GcgoewEva7WgFFJNmG9Gn2HA7uMooIzsqDyhxk9lYRDgezwgfPvv0Zc/lL
k6xTDiNvfgeHEDpXnV3EPTRWkCwsYypvFMgMB3N6SPVOc6CYCedSQY/bmAO/2VUi
HqWJ8uRHTx+4CHzPQO18vm7MaklkUU71eUBZEDeD3PM6Ca/g2avXu7bzcEcAmMec
6hTU378DawmvCsUr1kYCHE66DNT13frTYfhOrg9EFegEnIVeVyXK8F7K8jsCpZd3
verZu/KxP0FtAFXLGazY89ueE8IXP5EaF+keMRUNrN+KPvnLFXG6oN87fpeC5T2q
xUti8YE3XXLFxw7Xl0vkq6kfup+MznwA2+dAr1AylWfhUT8WcdZQxmt5pdSGELLP
EBvUVRqnzzRSn3MDJqxIvtzafdRbVeboQXcYfWpn+gwozXCw+os1pXuqjNpXsbEg
55BriLCcM6S4RRUVEnF3Int+493rVmZ1gejy4k2TxA+3SCYL6vBZOXgH2x9DHXYh
G4uwpf2tBlgRcDGXcxRXXy4cqrLc8lQEurQOdLvUGzA8c6nb4Q4Z1ol1dL8IG36u
vQODSjschz4k0PO0vmbeM9OGe0A8d4N20Tp4HUVKbMBgzw/YNSZnXSIm5MEGl1Zi
/dskJtcK40NkC+RAOyknJSO5eryc1trrZlZa7vSY6WSCp6gt/yPDjafYWQHSViKk
mWTaEvu/ewK6rFCLST2xu6LSHFEpvRuNsrelxMb6r83A5GgTW0LoRQDLN+HL139a
5uKw8nN2QxayKjac0MfSbMaF9XW6GAAGI9b/O26OdQtsgBGDWpCYtAmstBU8fYWD
A2WVgctNaJpwPQfY3UAW/hzPBmj5oY9ONTyu9Zd+YQLc7ZTEgmjfGN5Z5uNtCO/D
xHzLhUJ+e1CJgtR3EWlYciJ3AGyYTZIwNJw39T2TbETTs5TmP2H3awf+RVFfbYxa
j7tbb7x0MZ5w7ROcMjJcWhIqr/yg1LZqfmcK6qK4+39pwR217iZufXbFILWmgb3r
95sfdRsaXBsjadvL2niOju+oY7YEXSds0R0ocr6a41UYtFj2m4qaRacPbuKmzLea
cV/WOTWGFT7ZGTaVFM+yyYpThHEj0alXXUQLAYzppLPMBrWbS4lPun7yKWuYCXAn
SnPXi0/j9AadUu+wQNLq+B+CN2+dcj9/dFK3VoRkiNUvdsroG5yafB+eAgPTkpHb
R8xqVM/jdXgtvSW5ASYXGuC/0YfRNy/xllyaEnq7PMD4kZk7IUb82mP/IOh1jVud
Nvp9182cAAaJ5FwLT+rTTHrMJMsu+zvDq3FeFjnVxrPsQnF+uvVSm7ro6cCP6LAO
wC1MqwxEr9eMdk832CVuwt5sozGOC9pzh15LbwMDhxIrJDMIRDmcue+EKzryu0Gc
gPmKhP6i3Ury7oLToYryIwDG1DXit7VAPswCQZPM4O1Q6m9hU8dwAyJwcp9XVS/9
UG3niB++MXlyfFZsc1Ye/ybPSQkvdWEUGM8dM89BKiBipwclv0KEyXKYAML1x+pa
F6Wx/9gdtws0ccG3yIhJum02ULkLDc4GxGoh27l9yMXec3al8nsXbWZ+LOe6U41a
53qKNtthtxRT+XyGFkZ56G2beG9Yggqe/+TQKd6XHwnBoB/iHXSa1Y9V/R01JNOr
7eMSlfw8hYu63ULnI2Z/7Ji7IyMORFWWlhtcl8EM6A6E559WMad3syPnU0+XzaVI
fru8tZwlfY+EmEGoUOsnxaAdo3Qx16df1PPHGvFw9jfVpnfF3bUHKDoo/3rS0S9M
I87vIAxVgCPvMPTvcmEZc20o95RYrHQBeolVTWA2QzWiiY32xfrK+zlIEjjgF098
51TPXqqZuWNY/2aDvZZgpe3GltEI8WFJq22sVTRy0V8Pd0fP+myaGPv51N0NeLpj
GW95wCIKBroIf+5nfnLT0JKqo2jCQ3VCV/4JRZWol2kJs8LKsvJ7iDJuL0c58vm7
yeKa7Oqli31QR0pYsuFpKJtVLTkGFZnxKPdrykj/ar/TDwSIcX0E2Nx92QQQUk/Z
NLHI9iQ/IPpxqKKOlFaBEgCu9+TuW07LYJyHAqiAXMM=

#2-3 새로 생성한 vault_key인 vault_key_by_ssl을 이용해서 암호화합니다.
[vagrant@ansible-server ~]$  ansible-vault encrypt ./group_vars/nodes --vault-password-file ~/.ansible/vault_key_by_ssl
Encryption successful

#2-4 암호화된 파일을 확인합니다.
[vagrant@ansible-server ~]$ cat ./group_vars/nodes
$ANSIBLE_VAULT;1.1;AES256
38323237383235633039383566343232336237326565633738393662383837316134636639373732
6463626234326530633032323437303638663362643930350a323033636166646334656362343361
65336132366366633936323230363866316135613764336339333830393134356532663662363965
3166653161386136330a313232666439343536393932343730366334666235343738306630303534
35343637306238376362396563383034643564313431653834613938646464663332

#2-5 복호화도 해봅니다.
[vagrant@ansible-server ~]$  ansible-vault decrypt ./group_vars/nodes --vault-password-file ~/.ansible/vault_key_by_ssl
Decryption successful

혹시 비슷한 이슈가 있다면, 위의 방법이 도움이 되시길 바랍니다.
조훈 드림. 
[Continue reading...]

2018년 5월 30일 수요일

[Ansible] MAGIC_VARIABLE에 대해서~

- 0 개의 댓글
안녕하세요 ~!

오늘은 말이죠~! MAGIC_VARIABLE에 대해서 말해 보려고 합니다!!
이게 뭘까요?

매직?

magic shadowera에 대한 이미지 검색결과


이런 매직일까요? 하하 (참고로 제가 하는 게임입니다. !!)

그게 아니라 앤서블에 보면 
매직 변수라는게 있습니다. 


[ /usr/lib/python2.7/site-packages/ansible/constants.py ]

2.5.3 버전에서 보여지는 매직 변수인데 잘 눈에 안 들어오네요 


구 버전에 구조를 봅시다. 

MAGIC_VARIABLE_MAPPING = dict(
connection = ('ansible_connection',),
remote_addr = ('ansible_ssh_host', 'ansible_host'),
remote_user = ('ansible_ssh_user', 'ansible_user'),
port = ('ansible_ssh_port', 'ansible_port'),
accelerate_port = ('ansible_accelerate_port',),
password = ('ansible_ssh_pass', 'ansible_password'),
private_key_file = ('ansible_ssh_private_key_file', 'ansible_private_key_file'),
pipelining = ('ansible_ssh_pipelining', 'ansible_pipelining'),
shell = ('ansible_shell_type',),
become = ('ansible_become',),
become_method = ('ansible_become_method',),
become_user = ('ansible_become_user',),
become_pass = ('ansible_become_password','ansible_become_pass'),
become_exe = ('ansible_become_exe',),
become_flags = ('ansible_become_flags',),
ssh_common_args = ('ansible_ssh_common_args',),
docker_extra_args= ('ansible_docker_extra_args',),
sftp_extra_args = ('ansible_sftp_extra_args',),
scp_extra_args = ('ansible_scp_extra_args',),
ssh_extra_args = ('ansible_ssh_extra_args',),
sudo = ('ansible_sudo',),
sudo_user = ('ansible_sudo_user',),
sudo_pass = ('ansible_sudo_password', 'ansible_sudo_pass'),
sudo_exe = ('ansible_sudo_exe',),
sudo_flags = ('ansible_sudo_flags',),
su = ('ansible_su',),
su_user = ('ansible_su_user',),
su_pass = ('ansible_su_password', 'ansible_su_pass'),
su_exe = ('ansible_su_exe',),
su_flags = ('ansible_su_flags',),
executable = ('ansible_shell_executable',),
module_compression = ('ansible_module_compression',),
)
위에 보여지는 내용을 앤서블 플레이북이나, var_group 같은 곳에 넣으면 적용되는 변수들인 것입니다. 미리 정의되어 있는 변수들인거죠 FACTS와 별개로요~!

예를 들면, 코드 상에서 tasks 상에서 lldp의 sudo를 주기 위해서 보통 become에 yes를 넣게 되죠. 

---
- hosts: cl
  gather_facts: no
  tasks:
  - name: lldp service
    become: yes    service: name=lldpd state=restarted

그렇다면, 이런 예는 어떨까요? 

---
- hosts: cl
  gather_facts: no
  remote_user: cumulus
  become: yes
  vars:
    ansible_become_pass: CumulusLinux!
  tasks:
  - name: ssh-keygen
    service: name=lldpd state=restarted


 - remote_user      = ('ansible_ssh_user', 'ansible_user')
 - become_pass = ('ansible_become_password','ansible_become_pass')

쓰는 용법의 차이는 있지만, 이런 식으로 서로 바꾸어 가면서 쓸수 있습니다. 
아직은 완벽하게 어떤 부분은 vars에 쓰고, playbook에 쓰고, hosts에 쓰고가 정리가 되지 않은 느낌이긴 하나.~~ 서로 호환되는 이름이 어떤 것인지 안다면...

구글에서 검색해서 대략 만들수 있겠죠?

:) 도움이 되셨기를요오~!

[Continue reading...]

2018년 5월 21일 월요일

[VyOS] bond 모드에 따른 동작 테스트

- 0 개의 댓글


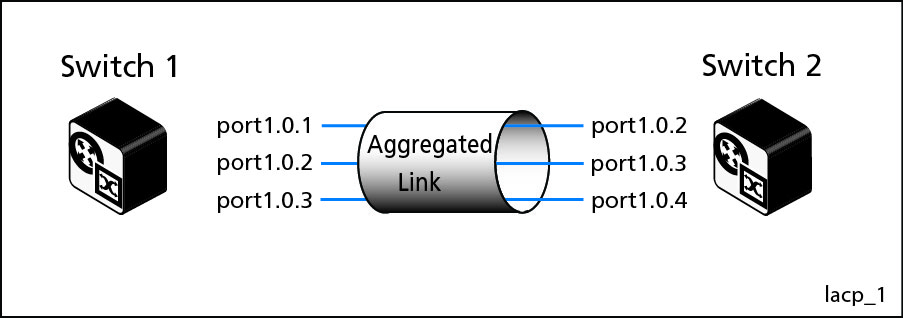
lacp에 대한 이미지 검색결과

내부 자료로 작성했던 건데~!
다른 분들도 재미있어 할꺼 같아서 올려요 :) 


This is some information per bond mode.  

#1. Bond mode 4 (Active-Backup)
  • LACP by eth2 and eth3
  •  
Here is real MAC from switch #1

vagrant@ansible-vyos01:~$ cat /proc/net/bonding/bond0
Ethernet Channel Bonding Driver: v3.7.1 (April 27, 2011)

Bonding Mode: IEEE 802.3ad Dynamic link aggregation
Transmit Hash Policy: layer2 (0)
MII Status: up
MII Polling Interval (ms): 250
Up Delay (ms): 0
Down Delay (ms): 0

802.3ad info
LACP rate: slow
Min links: 0
Aggregator selection policy (ad_select): stable
Active Aggregator Info:
        Aggregator ID: 1
        Number of ports: 2
        Actor Key: 17
        Partner Key: 17
        Partner Mac Address: 08:00:27:d3:c8:d8

Slave Interface: eth2
MII Status: up
Speed: 1000 Mbps
Duplex: full
Link Failure Count: 0
Permanent HW addr: 08:00:27:31:83:08
Aggregator ID: 1
Slave queue ID: 0

Slave Interface: eth3
MII Status: up
Speed: 1000 Mbps
Duplex: full
Link Failure Count: 0
Permanent HW addr: 08:00:27:94:2a:fb
Aggregator ID: 1
Slave queue ID: 0


Here is real MAC from switch #2
vagrant@ansible-vyos02:~$ cat /proc/net/bonding/bond0
Ethernet Channel Bonding Driver: v3.7.1 (April 27, 2011)

Bonding Mode: IEEE 802.3ad Dynamic link aggregation
Transmit Hash Policy: layer2 (0)
MII Status: up
MII Polling Interval (ms): 250
Up Delay (ms): 0
Down Delay (ms): 0

802.3ad info
LACP rate: slow
Min links: 0
Aggregator selection policy (ad_select): stable
Active Aggregator Info:
        Aggregator ID: 1
        Number of ports: 2
        Actor Key: 17
        Partner Key: 17
        Partner Mac Address: 08:00:27:31:83:08

Slave Interface: eth2
MII Status: up
Speed: 1000 Mbps
Duplex: full
Link Failure Count: 0
Permanent HW addr: 08:00:27:d3:c8:d8
Aggregator ID: 1
Slave queue ID: 0

Slave Interface: eth3
MII Status: up
Speed: 1000 Mbps
Duplex: full
Link Failure Count: 0
Permanent HW addr: 08:00:27:b3:34:0f
Aggregator ID: 1
Slave queue ID: 0

And Debug from both.

Switch  #1  on eth2

1590.199790 08:00:27:31:83:08 -> 01:80:c2:00:00:02 LACP Link Aggregation Control Protocol
1590.400544 08:00:27:d3:c8:d8 -> 01:80:c2:00:00:02 LACP Link Aggregation Control Protocol
1620.199776 08:00:27:31:83:08 -> 01:80:c2:00:00:02 LACP Link Aggregation Control Protocol
1620.399886 08:00:27:d3:c8:d8 -> 01:80:c2:00:00:02 LACP Link Aggregation Control Protocol
1650.210313 08:00:27:31:83:08 -> 01:80:c2:00:00:02 LACP Link Aggregation Control Protocol
1650.399770 08:00:27:d3:c8:d8 -> 01:80:c2:00:00:02 LACP Link Aggregation Control Protocol

Switch #1 on eth3
1500.149660 08:00:27:94:2a:fb -> 01:80:c2:00:00:02 LACP Link Aggregation Control Protocol
1500.649315 08:00:27:b3:34:0f -> 01:80:c2:00:00:02 LACP Link Aggregation Control Protocol
1530.149616 08:00:27:94:2a:fb -> 01:80:c2:00:00:02 LACP Link Aggregation Control Protocol
1530.649637 08:00:27:b3:34:0f -> 01:80:c2:00:00:02 LACP Link Aggregation Control Protocol
1560.149682 08:00:27:94:2a:fb -> 01:80:c2:00:00:02 LACP Link Aggregation Control Protocol
1560.649534 08:00:27:b3:34:0f -> 01:80:c2:00:00:02 LACP Link Aggregation Control Protocol
1590.149482 08:00:27:94:2a:fb -> 01:80:c2:00:00:02 LACP Link Aggregation Control Protocol
1590.650209 08:00:27:b3:34:0f -> 01:80:c2:00:00:02 LACP Link Aggregation Control Protocol


AND important thing is 01:80:c2:00:00:02 (Fixed multicast Address)
It is really cool isn’t it?

01-80-C2-00-00-02
0x8809
Ethernet OAM Protocol IEEE 802.3ah (A.K.A. "slow protocols")

Here is more info about 802.3ad and ah too.


#2. Bond mode 1 (Active-Backup)

You may already know what it is.
However there is some tweak for compatible option.

cat /etc/sysconfig/network-scripts/ifcfg-bond0
<snipped>
BONDING_OPTS="miimon=100 mode=active-backup fail_over_mac=1"


2-2.fail_over_mac=0 (default)

MAC per interface
-       All of interface are same MAC (from active INT)

[vagrant@ansible-server ~]$ ifconfig
bond0: flags=5187<UP,BROADCAST,RUNNING,MASTER,MULTICAST>  mtu 1500
        inet 10.10.1.10  netmask 255.255.255.0  broadcast 10.10.1.255
        inet6 fe80::a00:27ff:fe8e:98b8  prefixlen 64  scopeid 0x20<link>
        ether 08:00:27:8e:98:b8  txqueuelen 1000  (Ethernet)
        RX packets 0  bytes 0 (0.0 B)
        RX errors 0  dropped 0  overruns 0  frame 0
        TX packets 8  bytes 648 (648.0 B)
        TX errors 0  dropped 0 overruns 0  carrier 0  collisions 0


eth2: flags=6211<UP,BROADCAST,RUNNING,SLAVE,MULTICAST>  mtu 1500
        ether 08:00:27:8e:98:b8  txqueuelen 1000  (Ethernet)
        RX packets 0  bytes 0 (0.0 B)
        RX errors 0  dropped 0  overruns 0  frame 0
        TX packets 15  bytes 1176 (1.1 KiB)
        TX errors 0  dropped 0 overruns 0  carrier 0  collisions 0

eth3: flags=6211<UP,BROADCAST,RUNNING,SLAVE,MULTICAST>  mtu 1500
        ether 08:00:27:8e:98:b8  txqueuelen 1000  (Ethernet)
        RX packets 0  bytes 0 (0.0 B)
        RX errors 0  dropped 0  overruns 0  frame 0
        TX packets 13  bytes 1086 (1.0 KiB)
        TX errors 0  dropped 0 overruns 0  carrier 0  collisions 0

Bonding info

[vagrant@ansible-server ~]$ cat /proc/net/bonding/bond0
Ethernet Channel Bonding Driver: v3.7.1 (April 27, 2011)

Bonding Mode: fault-tolerance (active-backup)
Primary Slave: None
Currently Active Slave: eth2
MII Status: up
MII Polling Interval (ms): 100
Up Delay (ms): 0
Down Delay (ms): 0

Slave Interface: eth2
MII Status: up
Speed: 1000 Mbps
Duplex: full
Link Failure Count: 0
Permanent HW addr: 08:00:27:8e:98:b8
Slave queue ID: 0

Slave Interface: eth3
MII Status: up
Speed: 1000 Mbps
Duplex: full
Link Failure Count: 0
Permanent HW addr: 08:00:27:ea:f6:6b
Slave queue ID: 0


2-2. fail_over_mac=1

MAC per interface
-       Bond0 and active interface have same MAC.
-       However standby MAC is real MAC

[vagrant@ansible-server ~]$ ifconfig
bond0: flags=5187<UP,BROADCAST,RUNNING,MASTER,MULTICAST>  mtu 1500
        inet 10.10.1.10  netmask 255.255.255.0  broadcast 10.10.1.255
        inet6 fe80::a00:27ff:fe8e:98b8  prefixlen 64  scopeid 0x20<link>
        ether 08:00:27:8e:98:b8  txqueuelen 1000  (Ethernet)
        RX packets 0  bytes 0 (0.0 B)
        RX errors 0  dropped 0  overruns 0  frame 0
        TX packets 9  bytes 724 (724.0 B)
        TX errors 0  dropped 0 overruns 0  carrier 0  collisions 0

eth2: flags=6211<UP,BROADCAST,RUNNING,SLAVE,MULTICAST>  mtu 1500
        ether 08:00:27:8e:98:b8  txqueuelen 1000  (Ethernet)
        RX packets 0  bytes 0 (0.0 B)
        RX errors 0  dropped 0  overruns 0  frame 0
       TX packets 24  bytes 1900 (1.8 KiB)
        TX errors 0  dropped 0 overruns 0  carrier 0  collisions 0

eth3: flags=6211<UP,BROADCAST,RUNNING,SLAVE,MULTICAST>  mtu 1500
        ether 08:00:27:ea:f6:6b  txqueuelen 1000  (Ethernet)
        RX packets 0  bytes 0 (0.0 B)
        RX errors 0  dropped 0  overruns 0  frame 0
        TX packets 13  bytes 1086 (1.0 KiB)
        TX errors 0  dropped 0 overruns 0  carrier 0  collisions 0

Bonding info
[vagrant@ansible-server ~]$ cat /proc/net/bonding/bond0
Ethernet Channel Bonding Driver: v3.7.1 (April 27, 2011)

Bonding Mode: fault-tolerance (active-backup) (fail_over_mac active)
Primary Slave: None
Currently Active Slave: eth2
MII Status: up
MII Polling Interval (ms): 100
Up Delay (ms): 0
Down Delay (ms): 0

Slave Interface: eth2
MII Status: up
Speed: 1000 Mbps
Duplex: full
Link Failure Count: 0
Permanent HW addr: 08:00:27:8e:98:b8
Slave queue ID: 0

Slave Interface: eth3
MII Status: up
Speed: 1000 Mbps
Duplex: full
Link Failure Count: 0
Permanent HW addr: 08:00:27:ea:f6:6b
Slave queue ID: 0

What if active interface is down?
  • Bond0’s MAC change to standby’s MAC. i.e. MAC is changed the perspective of receiver(switch?)

eth3: flags=6211<UP,BROADCAST,RUNNING,SLAVE,MULTICAST>  mtu 1500
        ether 08:00:27:ea:f6:6b  txqueuelen 1000  (Ethernet)
        RX packets 0  bytes 0 (0.0 B)
        RX errors 0  dropped 0  overruns 0  frame 0
        TX packets 27  bytes 2160 (2.1 KiB)
        TX errors 0  dropped 0 overruns 0  carrier 0  collisions 0

bond0: flags=5187<UP,BROADCAST,RUNNING,MASTER,MULTICAST>  mtu 1500
        inet 10.10.1.10  netmask 255.255.255.0  broadcast 10.10.1.255
        inet6 fe80::a00:27ff:feea:f66b  prefixlen 64  scopeid 0x20<link>
        ether 08:00:27:ea:f6:6b  txqueuelen 1000  (Ethernet)
        RX packets 0  bytes 0 (0.0 B)
        RX errors 0  dropped 0  overruns 0  frame 0
        TX packets 21  bytes 1688 (1.6 KiB)
        TX errors 0  dropped 0 overruns 0  carrier 0  collisions 0


And this mode have drawback. If you have interest about it, please refer to below.
Using "fail_over_mac=active" on Ethernet devices has other drawbacks, e.g. if gratuitous ARP is lost or incorrectly processed after a failover, bond is not accessible until it sends a packet.

Reference:

Source Code:

[Continue reading...]

2018년 5월 7일 월요일

[vagrant] windows2016 for Ansible

- 0 개의 댓글
안녕하세요!!

며칠 전에 유데미와 인프런 강의를 통해서도 안내했지만...
블로그에 오시는 분들도 도움이 되시면 좋을 것 같아서요 :)
앤서블 테스트용 windows 2016를 포팅했습니다!! 짝짝짝 셀프 짝~!
필요하신 분들은 사용하시면 될 것 같아요~~!


Windows 2016으로 실습 가능하도록 작성하고, 베이그런트 포장하여 올려두었습니다. 

해당 주소는 다음과 같고요..
https://app.vagrantup.com/sysnet4admin/boxes/Windows2016

사용법은 기존에 이미지에서 'sysnet4admin/windows2016' 로 이미지(박스) 이름만 변경하시면 됩니다. 

예시도 함께 드립니다~!
< 예시>
c:\HashiCorp>vagrant up ansible-node07
Bringing machine 'ansible-node07' up with 'virtualbox' provider...
==> ansible-node07: Importing base box 'sysnet4admin/windows2016'...
==> ansible-node07: Matching MAC address for NAT networking...
==> ansible-node07: Checking if box 'sysnet4admin/windows2016' is up to date...
==> ansible-node07: Setting the name of the VM: Ansible-Node07(github_SysNet4Admin)
==> ansible-node07: Clearing any previously set network interfaces...
==> ansible-node07: Preparing network interfaces based on configuration...
    ansible-node07: Adapter 1: nat
    ansible-node07: Adapter 2: bridged
==> ansible-node07: Forwarding ports...
    ansible-node07: 22 (guest) => 60017 (host) (adapter 1)
    ansible-node07: 5985 (guest) => 55985 (host) (adapter 1)
    ansible-node07: 5986 (guest) => 55986 (host) (adapter 1)
==> ansible-node07: Running 'pre-boot' VM customizations...
==> ansible-node07: Booting VM...
==> ansible-node07: Waiting for machine to boot. This may take a few minutes...
    ansible-node07: WinRM address: 127.0.0.1:55985
    ansible-node07: WinRM username: vagrant
    ansible-node07: WinRM execution_time_limit: PT2H
    ansible-node07: WinRM transport: negotiate
==> ansible-node07: Machine booted and ready!
Sorry, don't know how to check guest version of Virtualbox Guest Additions on this platform. Stopping installation.
==> ansible-node07: Checking for guest additions in VM...
==> ansible-node07: Setting hostname...
==> ansible-node07: Configuring and enabling network interfaces...
==> ansible-node07: Running provisioner: shell...
    ansible-node07: Running: inline PowerShell script
    ansible-node07: Ok.

[Continue reading...]
 
Copyright © . 쿠버네티스 전문가 블로그 - Posts · Comments
Theme Template by BTDesigner · Powered by Blogger