2019년 12월 2일 월요일

[k8s/쿠버네티스] alias _v0.3

- 0 개의 댓글


안녕하세요~~오~

요즘 교육의 목적으로 k8s를 보고 있는데요.
알다시피 k8s를 하다보면 kubectl get 어쩌구 저쩌구 kubectl apply -f 어쩌구 저쩌구 kubectl exec 어쩌구....-_-;;;

내 얼굴 같구만..(답이 없네...)
어쩌란 말이오 짤에 대한 이미지 검색결과

그래서 앤서블에서 anp(ansible-playbook), ans(ansible) 만든 것처럼, alias를 하려고 좀 알아봤는데..딱 맘에 드는게 없더라고요.

그래서 뭐...맘에 드는 도구가 없다면? 직접 만들어 쓰는게 도리

로켓단 짤에 대한 이미지 검색결과

이렇게 만들었습니다.

 1
 2
 3
 4
 5
 6
 7
 8
 9
10
11
12
13
14
15
16
17
18
19
20
21
22
23
24
25
26
27
28
29
30
31
32
33
34
35
36
37
38
#! /usr/bin/env bash

if grep -q sysnet4admin ~/.bashrc; then
  echo "k8s_rc already installed"
  exit 0
fi

echo -e "\n#custome rc provide @sysnet4admin " >> ~/.bashrc
echo "source ~/.k8s_rc " >> ~/.bashrc

cat > ~/.k8s_rc <<'EOF'
#! /usr/bin/env bash
# HoonJo ver0.1
# https://github.com/sysnet4admin/IaC
alias kc='kubectl'
alias kcg='kubectl get'
alias kca='kubectl apply -f'
alias kcd='kubectl describe'
alias kcc='kubectl create'
alias kcs='kubectl scale'
alias kce='kubectl export'
alias kcl='kubectl logs'
alias kcgw='kubectl get $1 -o wide'
kcee(){
  if [ $# -eq 1 ]; then
    kubectl exec -it $(kubectl get pods | tail --lines=+2 | awk '{print $1}' | awk NR==$1) -- /bin/bash;
  else
    echo "usage: kcee <pod number>"
  fi
}
kceq(){
  echo -e ""
  kubectl get pods | tail --lines=+2 | awk '{print NR " " $1}'
  echo -en "\nPlease select pod in: "
  read select
  kubectl exec -it $(kubectl get pods | tail --lines=+2 | awk '{print $1}' | awk NR==$select) -- /bin/bash;
}
EOF
https://github.com/sysnet4admin/IaC/blob/master/manifests/k8s_rc.sh

다른건 아마 그냥 쓰면 아실텐데..약간 특이한건 kcee, kceq인데요.
컨테이너를 접속하려면 exe -it을 주로 쓰는데요 그리고  -- /bin/bash를 붙여서요. 이건 넘겨받으려다 보니까 alias로 구현하기가 어렵더라고요.
(변: 보통 kubectl을 k로 alias하는데요, 추후에 kubeflow나 다른 kube들 확장을 고려해서 kubectl을 kc로 alias했어요)

그래서 위와 같이 함수로 구현했어요.

사용예제는 요래요래 합니다.

1. 설치 + 설정 다시 로드(su -) 
[root@m-k8s ~]# bash <(curl -s https://raw.githubusercontent.com/sysnet4admin/IaC/master/manifests/k8s_rc.sh)
[root@m-k8s ~]# su -

2. 도커 컨테이너 설치 
[root@m-k8s ~]# kubectl apply -f https://raw.githubusercontent.com/sysnet4admin/Iac/master/misc/echo-nginx.yaml

3. 설치된 애들 확인 
[root@m-k8s ~]# kcg pods
NAME                          READY   STATUS    RESTARTS   AGE
echo-nginx-5cc884d64c-4kjdh   1/1     Running   0          80s
echo-nginx-5cc884d64c-g2hgb   1/1     Running   0          80s
echo-nginx-5cc884d64c-rkg2x   1/1     Running   0          80s

4. kcee 테스트
[root@m-k8s ~]# kcee 1
root@echo-nginx-5cc884d64c-4kjdh:/#

5. kceq 테스트
[root@m-k8s ~]# kceq
1 echo-nginx-5cc884d64c-4kjdh
2 echo-nginx-5cc884d64c-g2hgb
3 echo-nginx-5cc884d64c-rkg2x
Please select pod in: 3
root@echo-nginx-5cc884d64c-rkg2x:/#

재미나게 쓰세요 :)
빠잉요

+v1 오리댕이님이 소스를 수정해 주셔서 아래와 같이 다시 업데이트 합니다아~

 1
 2
 3
 4
 5
 6
 7
 8
 9
10
11
12
13
14
15
16
17
18
19
20
21
22
23
24
25
26
27
28
29
30
31
32
33
34
35
36
37
38
39
40
41
42
43
44
45
46
47
48
49
50
51
52
53
54
55
56
57
58
#! /usr/bin/env bash
# kceq revision by 오리댕이
 
if grep -q sysnet4admin ~/.bashrc; then
  echo "k8s_rc already installed"
  exit 0
fi

echo -e "\n#custome rc provide @sysnet4admin " >> ~/.bashrc
echo "source ~/.k8s_rc " >> ~/.bashrc

cat > ~/.k8s_rc <<'EOF'
#! /usr/bin/env bash
# HoonJo ver0.1
# https://github.com/sysnet4admin/IaC
alias kc='kubectl'
alias kcg='kubectl get'
alias kca='kubectl apply -f'
alias kcd='kubectl describe'
alias kcc='kubectl create'
alias kcs='kubectl scale'
alias kce='kubectl export'
alias kcl='kubectl logs'
alias kcgw='kubectl get $1 -o wide'
kcee(){
  if [ $# -eq 1 ]; then
    kubectl exec -it $(kubectl get pods | tail --lines=+2 | awk '{print $1}' | awk NR==$1) -- /bin/bash;
  else
    echo "usage: kcee <pod number>"
  fi
}
kceq(){
  if [ $# -eq 1 ]; then
    NAMESPACE=$1
    exi_chk=($(kubectl get namespaces | tail --lines=+2 | awk '{print $1}'))
    if [[ ! "${exi_chk[@]}" =~ "$NAMESPACE" ]]; then
      echo -e "$NAMESPACE isn't a namespace. Try other as below again:\n"
      kubectl get namespaces
      exit 1
    else
      kubectl get pods -n $NAMESPACE | tail --lines=+2 | awk '{print NR " " $1}'
      echo -en "\nPlease select pod in $NAMESPACE: "
      read select
      kubectl exec -it -n $NAMESPACE $(kubectl get pods -n $NAMESPACE | tail --lines=+2 | awk '{print $1}' | awk NR==$select) -- /bin/bash;
    fi
  elif [ $1 -z ]; then
    echo ""
    kubectl get pods | tail --lines=+2 | awk '{print NR " " $1}'
    echo -en "\nPlease select pod in default: "
    read select
    kubectl exec -it $(kubectl get pods | tail --lines=+2 | awk '{print $1}' | awk NR==$select) -- /bin/bash;
  else
    echo ""
    kubectl get namespace
    echo -e "\nusage: kceq or kceq <namespace>\n"
  fi
}
EOF


사용방법은 동일합니다.

1. 이건 설정
[root@m-k8s ~]# bash <(curl -s https://raw.githubusercontent.com/sysnet4admin/IaC/master/manifests/k8s_rc.sh)
[root@m-k8s ~]# su -

2. kceq
[root@m-k8s ~]# kceq
1 echo-nginx-5cc884d64c-8qc8d
2 echo-nginx-5cc884d64c-9bvxx
3 echo-nginx-5cc884d64c-blg6j
Please select pod in default: 2
root@echo-nginx-5cc884d64c-9bvxx:/#


3. kceq 틀린 네임스페이스 

[root@m-k8s ~]# kceq hoonjo
hoonjo isn't a namespace. Try other as below again:
NAME              STATUS   AGE
default           Active   24h
istio-system      Active   22h
kafka             Active   18h
kube-node-lease   Active   24h
kube-public       Active   24h
kube-system       Active   24h

4. kceq kafka
logout[root@m-k8s ~]# kceq kafka
1 kafka-0
2 pzoo-0
Please select pod in kafka: 1
root@kafka-0:/opt/kafka#

그럼 또 빠잉요

===

흔한 일이 아닌데 업데이트를 또 하네요..
pod 안에 컨테이너가 여러개 있을 경우가 있다고 오리님이 소스를 주셔서 수정합니다.

 1
 2
 3
 4
 5
 6
 7
 8
 9
10
11
12
13
14
15
16
17
18
19
20
21
22
23
24
25
26
27
28
29
30
31
32
33
34
35
36
37
38
39
40
41
42
NAMESPACE=$1
exi_chk=($(kubectl get namespaces | tail --lines=+2 | awk '{print $1}'))
  #check to exist namespace but it is not perfect due to /^word$/ is not work
  if [[ ! "${exi_chk[@]}" =~ "$NAMESPACE" ]]; then
    echo -e "$NAMESPACE isn't a namespace. Try other as below again:\n"
    kubectl get namespaces
    echo -e "\nusage: kceq or kceq <namespace> [-c]\n"
    exit 1
  elif [ $# -eq 1 ]; then
    kubectl get pods -n $NAMESPACE | tail --lines=+2 | awk '{print NR " " $1}'
    echo -en "\nPlease select pod in $NAMESPACE: "
    read select
    kubectl exec -it -n $NAMESPACE $(kubectl get pods -n $NAMESPACE | tail --lines=+2 | awk '{print $1}' | awk NR==$select) -- /bin/bash;
  elif [ $# -eq 2 ]; then
    if [ ! $2 == "-c" ]; then
      echo -e "only -c option is available"
      exit 1
    fi
    echo -e ""
    kubectl get pods -n $NAMESPACE | tail --lines=+2 | awk '{print NR " " $1}'
    echo -en "\nPlease select pod in $NAMESPACE: "
    read select
    POD_SELECT=$select
    POD=$(kubectl get pods -n $NAMESPACE | tail --lines=+2 | awk '{print $1}' | awk NR==$select)
    echo -e ""
    kubectl describe pod -n $NAMESPACE $POD | grep -B 1 "Container ID" | egrep -v "Container|--" | awk -F":" '{print NR $1}'
    echo -en "\nPlease select container in: "
    read select
    CONTAINER=$(kubectl describe pod -n $NAMESPACE $POD | grep -B 1 "Container ID" | egrep -v "Container|--" | awk -F":" '{print $1}' | awk NR==$select)
    kubectl exec -it -n $NAMESPACE $(kubectl get pods -n $NAMESPACE | tail --lines=+2 | awk '{print $1}' | awk NR==$POD_SELECT) -c $CONTAINER -- /bin/bash;
  #default pod run
  elif [ $1 -z ]; then
    echo ""
    kubectl get pods | tail --lines=+2 | awk '{print NR " " $1}'
    echo -en "\nPlease select pod in default: "
    read select
    kubectl exec -it $(kubectl get pods | tail --lines=+2 | awk '{print $1}' | awk NR==$select) -- /bin/bash;
  else
    echo ""
    kubectl get namespace
    echo -e "\nusage: kceq or kceq <namespace> [-c]\n"
  fi

이제 이거만 봐도 아마 다들 아시겠죠? 고로 설명은 생략 :)

[root@m-k8s ~]# kceq

1 echo-nginx-5cc884d64c-djk4k
2 echo-nginx-5cc884d64c-l8hsj
3 echo-nginx-5cc884d64c-nljnn
4 elder-yak-mariadb-master-0
5 elder-yak-mariadb-slave-0
6 wiggly-fox-redis-master-0
7 wiggly-fox-redis-slave-0

Please select pod in default: 2
root@echo-nginx-5cc884d64c-l8hsj:/# exit
exit

[root@m-k8s ~]# kceq 1
1 isn't a namespace. Try other as below again:

NAME              STATUS   AGE
default           Active   108m
istio-system      Active   15m
kafka             Active   40m
kube-node-lease   Active   108m
kube-public       Active   108m
kube-system       Active   108m

usage: kceq or kceq <namespace> [-c]

logout

[root@m-k8s ~]# kceq
-bash: kceq: command not found
[root@m-k8s ~]# su -
[root@m-k8s ~]# kceq istio-system
1 grafana-6b65874977-4vs4r
2 istio-citadel-86d9c5dc-877pq
3 istio-egressgateway-7cb7fdff55-qf7t5
4 istio-galley-6ff4cbc457-bnc55
5 istio-ingressgateway-68884574c5-gjkbx
6 istio-pilot-5646cc96d4-66j9x
7 istio-policy-7c76fb7fdb-xnw7j
8 istio-sidecar-injector-5464f6dff-wcfhb
9 istio-telemetry-557d4bf784-sspmw
10 istio-tracing-c66d67cd9-qts9r
11 kiali-8559969566-5zsxg
12 prometheus-66c5887c86-qc6c2

Please select pod in istio-system: 5
root@istio-ingressgateway-68884574c5-gjkbx:/# exit
exit

[root@m-k8s ~]# kceq kafka -c

1 kafka-0
2 pzoo-0

Please select pod in: 2

1  init-config
2  zookeeper

Please select container in: 2
root@pzoo-0:/opt/kafka#


[Continue reading...]

2019년 9월 17일 화요일

[x86/HW] 왜? 메모리에서 Multibit error가 발생했는데도 시스템이 다시 시작되지 않을까요?

- 1 개의 댓글


안녕하세요~

기묘한 주제로 오늘은 ~~ 찾아뵙습니다~아
요즘은 서버하면 Unix 서버보다 x86 계열을 서버를 주로 많이 쓰잖나요
(저만 그런건 아니겠죠;;;)

아니라고 해줘요 짤에 대한 이미지 검색결과


하하 각설하고요.

x86을 쓰다 보면 제일 많이 얻어 맞는 장애는 Disk fault 그리고 메모리 ECC인데요.
ECC는 간단히 말해서 여분의 전송 BIT를 가지고 문제가 생기는 BIT의 오류를 교정하는 것입니다. 아우...이걸 어떻게 쉽게 얘기할수 있을지...ㅠㅠ

요즘 추세로 제일 이해하기 쉬운건 RAID5 디스크 처럼 생각하시면 되요~~!

ecc memory에 대한 이미지 검색결과

여튼...그래서 두개의 BIT의 문제가 생기면 해당 오류를 정정할수가 없기 때문에 시스템이 현재 상태를 보호하기 위해서 다시 시작되게 되거든요. 원래는 이랬었어요

근데요 최근에 다른 방법으로 정정하는 기술들이 나와서 소개합니다.
정확하게는 최대한 시스템에 영향을 안 주고 넘어갈수 있도록 조정한거지만요!

내용은 이렇습니다.

ü    기술적으로 많은 경우 CPU가 해당 데이터를 patch하여 사용하기 때문에 UC Uncorrected Error 에 속하여 시스템이 다시 시작하게 됩니다.  하지만, 시스템이 데이터를 아직 patch하지 않은 경우에는 다시 시작하지 않을 가능성이 있는 조건인 UCR Uncorrected Recoverable Error 에 속하게 됩니다. 이 중에 DCU Data Cache UnitIFU Instruction Fetch Unit에 의해서 발견된 것은 SRAR Software Recoverable Action 에 속하게 되고, 이 경우에는 두가지 경우가 있는데, kernel space일 경우에는 kernel panic이 발생하게 되고 user space인 경우에는 해당 프로세스를 죽이게 됩니다.

ü  따라서, 현재의 경우에는 높은 가능성으로 SARO Software Recoverable Action Optional에 속하게 되는데, 이는 Memory patrol scrub 기능 또는 LLC Last Level Cache writeback 트랜잭션시에 발견되게 됩니다.
이 경우에는 kernel space 일 경우이거나,  user space일 경우 페이지 Page자체를 모두 무시하거나 격리처리하게 됩니다.


되게 어렵죠 -_-?
이거 영문을 거의 그대로 번역해서 그런건데요 그나마 이해하고 써도 이정도로..어렵...
쉽게 다시 설명하면요. 메모리는 CPU에서 쓰고자하는 내용을 CPU내부의 register와 sram 이후로 가장 빠르게 접근할수 있는 영역인데요.
그래서 CPU가 가져다가 참조하고 있는 것들이라면, 그건 고대로 Reboot합니다.
우리가 알고 있는거죠! 여기까지는 문제 없죠?

자 그러면...

   ê·¸ë ‡ë‹¤ê³  해줘요에 대한 이미지 검색결과

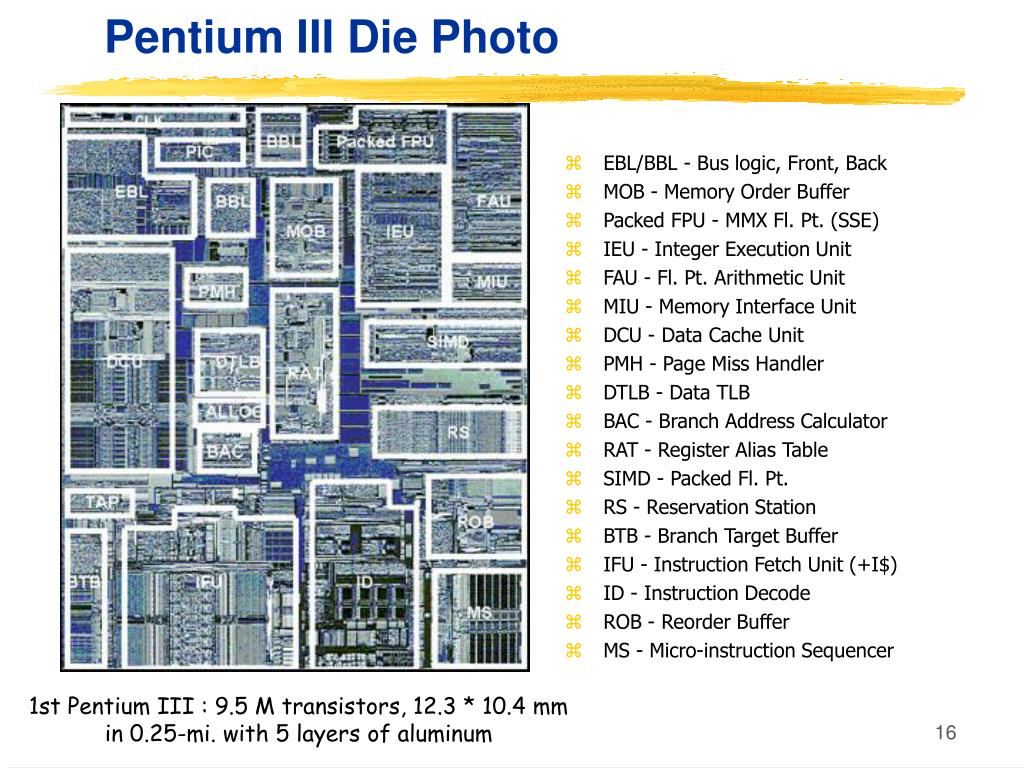
CPU가 아직 참조하지 않은 메모리에 담긴 데이터가 1) DCU Data Cache Unit와 2) IFU Instruction Fetch Unit  에 의해서 Multibit 에러가 발견되게 되면요. 두가지 방식으로 동작하게 되는데요.

dcu ifu memory에 대한 이미지 검색결과


Kernel panic = 우리가 알고 있는 리부우우우트

User space = 프로세스만 킬 (근데 DB단이라면 -_- OMG)...뭐 rollback해서 보호하거나 commit 안했을테니모..


그리고, Memory patrol scrub 기능 또는 LLC Last Level Cache 의 writeback 트랜잭션시 에 의해서 발견하게 되면요.

page 자체를 격리해 버려요. 있잖나요 디스크의 Bad Sector를 막아버리는 것처럼? 요즘 SSD도 비트가 flap을 못하면 막도만요~~ 수명이 있는거니까
이건 시스템에 아무런 영향이 없어요~그리고 사실 Page isolation이니까 다시 시작하게 되면 어짜피 reset 될꺼에요.

근데 Multibit 에러가 난 메모리는 시스템이 다시 시작할때 교체해 두는게 좋겠죠?
이번에는 운이 좋았던거에요~!


이를 표로 정리하면 이렇게 되요.


재미있지 않나요~ :)

또 변화한 신기한 이야기가 있다면 또 쓸께요~~!

==========================

1) DCU

Data Cache Unit

The Data Cache Unit (DCU) consists of the following sub-blocks:
  • The Level 1 (L1) data cache controller, that generates the control signals for the associated embedded tag, data, and dirty RAMs, and arbitrates between the different sources requesting access to the memory resources. The data cache is 4-way set associative and uses a Physically Indexed Physically Tagged (PIPT) scheme for lookup that enables unambiguous address management in the system.
  • The load/store pipeline that interfaces with the DPU and main TLB.
  • The system controller that performs cache and TLB maintenance operations directly on the data cache and on the instruction cache through an interface with the IFU.
  • An interface to receive coherency requests from the Snoop Control Unit (SCU).
The data cache has the following features:
  • Pseudo-random cache replacement policy.
  • Streaming of sequential data because of multiple word load instructions, for example LDMLDRDLDP and VLDM.
  • Critical word first linefill on a cache miss.
See Chapter 6 Level 1 Memory System for more information.
If the CPU cache protection configuration is implemented, the L1 Data cache tag RAMs and dirty RAMs are protected by parity bits. The L1 Data cache data RAMs are protected using Error Correction Codes (ECC). The ECC scheme is Single Error Correct Double Error Detect (SECDED).
The DCU includes a combined local and global exclusive monitor, used by the Load-Exclusive/ Store-Exclusive instructions. See the ARM® Architecture Reference Manual ARMv8, for ARMv8-A architecture profile for information about these instructions.

2) IFU

A2.1.1 Instruction fetch

The Instruction Fetch Unit (IFU) fetches instructions from the L1 instruction cache and delivers up to three instructions per cycle to the instruction decode unit.
The IFU includes:
  • A 64KB, 4-way, set associative L1 instruction cache with 64-byte cache lines and optional dual-bit parity protection.
  • A fully associative instruction micro TLB with native support for 4KB, 64KB, and 1MB page sizes.
  • A 2-level dynamic branch predictor.

3) LLC
메모리 계층도에서 보면 가장 상위층에 존재하는 레지스터 다음에 캐시가 존자한다. 이 캐시도 세부적으로 분류할 수 있다. 보통 컴퓨터를 살때 보면 L1,L2와 같이 캐시가 얼마다 라고 적혀 있는 것을 확인 할 수 있을 것이다. 일반적으로 현대 프로세서는 L1,L2 두개로 구성되어 있고 L3캐시까지 있는 CPU 도 볼 수 있을 것이다. 즉 L1이 가장 성능이 좋을것이고 그다음 순차적으로 좋을것이다. 여기서 마지막 레벨에 있는 캐시를 Last Level Cache (LLC)라고 부른다. LLC이후에는 시간이 오래 걸리므로 캐시와 구분해서 계층도에서 표시된다.

And Wirteback 
In a conventional writeback policy, dirty cache blocks are sent to the write buffer when they are evicted from the lastlevel cache (LLC). The write buffer is drained following the buffer management policy. Several proposals [16, 18, 13] improve writeback efficiency using an intelligent scheduling algorithm. However, the write buffer only has a small number of entries due to design complexity and power efficiency, limiting the ability to schedule high locality write requests as well as the possibility to flexible adjust read/write priority


Reference:
[Continue reading...]

2019년 9월 14일 토요일

[k8s/쿠버네티스] container hang 간단 복구 (ContainerCreating)

- 0 개의 댓글
container kubernetes hang에 대한 이미지 검색결과

오늘은 글 쓰는날 인가봅니다~!

[root@m-k8s ~]# kubectl get pods --output=wide | grep -v Running
NAME                                READY   STATUS              RESTARTS   AGE    IP                NODE     NOMINATED NODE   READINESS GATES
nginx-deployment-5754944d6c-pwkw5   0/1     ContainerCreating   0          109m   <none>            w1-k8s   <none>           <none>


Pods를 배포하다 보면, 별별일이 다 발생하는데, 일단 이번꺼는 컨테이너를 생성하다가 발생했네요 (ContainerCreating)

debug 순서는 일단...log를 봐야 합니다.
[root@m-k8s ~]# kubectl describe pods nginx-deployment-5754944d6c-pwkw5
Name: nginx-deployment-5754944d6c-pwkw5
Namespace: default
Priority: 0
Node: w1-k8s/192.168.1.101
Start Time: Fri, 13 Sep 2019 23:32:01 +0000
Labels: app=nginx
pod-template-hash=5754944d6c
Annotations: <none>
Status: Pending
IP:
Controlled By: ReplicaSet/nginx-deployment-5754944d6c
Containers:
nginx:
Container ID:
Image: nginx:1.7.9
Image ID:
Port: 80/TCP
Host Port: 0/TCP
State: Waiting
Reason: ContainerCreating
Ready: False
Restart Count: 0
Environment: <none>
Mounts:
/var/run/secrets/kubernetes.io/serviceaccount from default-token-jdgfv (ro)
Conditions:
Type Status
Initialized True
Ready False
ContainersReady False
PodScheduled True
Volumes:
default-token-jdgfv:
Type: Secret (a volume populated by a Secret)
SecretName: default-token-jdgfv
Optional: false
QoS Class: BestEffort
Node-Selectors: <none>
Tolerations: node.kubernetes.io/not-ready:NoExecute for 300s
node.kubernetes.io/unreachable:NoExecute for 300s
Events:
Type Reason Age From Message
---- ------ ---- ---- -------
Warning FailedCreatePodSandBox 5m56s (x1135 over 112m) kubelet, w1-k8s (combined from similar events): Failed create pod sandbox: rpc error: code = Unknown desc = failed to set up sandbox container "e793e21758c4f703653cc24aeeb537416ef286343573b21eccaebc916cf43718" network for pod "nginx-deployment-5754944d6c-pwkw5": NetworkPlugin cni failed to set up pod "nginx-deployment-5754944d6c-pwkw5_default" network: error adding host side routes for interface: cali1923ceab5c4, error: route (Ifindex: 1220, Dst: 192.168.221.131/32, Scope: 253) already exists for an interface other than 'cali1923ceab5c4'
Normal SandboxChanged 61s (x1262 over 112m) kubelet, w1-k8s Pod sandbox changed, it will be killed and re-created.

CNI와 통신상에 문제가 생긴거 같은데요.
본인들 말로는 죽이고 다시 만들겠다고 했는데...-_-
의지가 없네요 의지가 없어요...

뭐 그러면 또 이럴때 사람이 나서서 해줘야죠~!!!
다 자동화 되면..사실 저희 먹고 살수가 없지 않겠습니까!!!


그래서, 일단은 scale을 줄이고, 다시 늘려서 복구해 줬습니다.

[root@m-k8s ~]# kubectl scale deployment nginx-deployment --replicas=199
deployment.extensions/nginx-deployment scaled
[root@m-k8s ~]# kubectl get rs
NAME                          DESIRED   CURRENT   READY   AGE
nginx-deployment-5754944d6c   199       199       199     15h
[root@m-k8s ~]# kubectl scale deployment nginx-deployment --replicas=200
deployment.extensions/nginx-deployment scaled
[root@m-k8s ~]# kubectl get rs
NAME                          DESIRED   CURRENT   READY   AGE
nginx-deployment-5754944d6c   200       200       200     15h
[root@m-k8s ~]# kubectl get pods --output=wide | grep -v Running
NAME                                READY   STATUS    RESTARTS   AGE    IP                NODE     NOMINATED NODE   READINESS GATES

다음에는 세부적으로 에러 생기는걸 debug하는걸 좀 연구해 봐야 겠어요
모니터링이랑요.

빠잉 
[Continue reading...]

[k8s/쿠버네티스] scale & replicas

- 0 개의 댓글
k8s scale에 대한 이미지 검색결과

안녕하세요

연속 이틀 글을 쓰는 이유는 scale에 너무 감명 받아서~~
지난번에 pod automation (이라고 쓰고 생각해 보니 실제로 pod는....calio만. --)
을 하고 나서 실제로 pod를 배포해 봤는데요

그 배포된 pod의 scale이 꽤나 자유롭게 되더라고요.
(아마 이러고 나면 모니터링을 다시 봐야 할꺼 같긴 한데)

일단 테스트로 배포한 pod는 이걸 사용했고요

kubectl apply -f https://k8s.io/docs/tasks/run-application/deployment.yaml 

이걸 다음의 명령을 통해서 늘리고 줄여 보았습니다.

kubectl scale deployment nginx-deployment --replicas=60

그러면 이렇게 확인이 되어요
[root@m-k8s ~]# kubectl get rs nginx-deployment-5754944d6c
NAME                          DESIRED   CURRENT   READY   AGE
nginx-deployment-5754944d6c   60        60        60      13h

그리고 이걸 200개의 replicas로 확장하면,

[root@m-k8s ~]# kubectl scale deployment nginx-deployment --replicas=200
deployment.extensions/nginx-deployment scaled

이렇게 늘어납니다. 

[root@m-k8s ~]# kubectl get rs nginx-deployment-5754944d6c
NAME                          DESIRED   CURRENT   READY   AGE
nginx-deployment-5754944d6c   200       200       77      13h

[root@m-k8s ~]# kubectl get rs nginx-deployment-5754944d6c
NAME                          DESIRED   CURRENT   READY   AGE
nginx-deployment-5754944d6c   200       200       137     13h

[root@m-k8s ~]# kubectl get rs nginx-deployment-5754944d6c
NAME                          DESIRED   CURRENT   READY   AGE
nginx-deployment-5754944d6c   200       200       199     13h


감동적이었어요!
감동적 짤에 대한 이미지 검색결과


그럼 잘 배포 되었나..그중에 하나를 찍어볼까요?


오...역시 많이 쓰는 툴은 다 그만한 의미가 있는거 같아요 :) 
마이크로 서비스 수준의 nginx 들이겠지만...200개 가량을 이렇게 쉽게 배포하고 수거할수 있다니요!!

모니터링도 하고 안되는 애들도 다시 좀 봐야 겠어요.

빠잉!


[Continue reading...]

2019년 9월 13일 금요일

[k8s/쿠버네티스] Pod automation (v0.00000001)

- 0 개의 댓글
k8s에 대한 이미지 검색결과


안녕하세요오오~

추석입니다. 당일이에요~~
뭐...전 할일도 없고....-_-; 이러니 왠지 ...

우울 짤에 대한 이미지 검색결과

까지는 아니구요 ;) ㅎㅎㅎㅎ 요즘 k8s(쿠버네티스)를 공부 중인데요.
결국 이걸 해야 먹고 살겠더라고요 ㅠㅠ (뭐 파이썬이나 앤서블도 먹고 살려고 한거긴 한데...)

공부를 한다는건...개인적으로 제일 좋은건 랩을 꾸미고 기능을 테스트하고 오류를 만나고 내부 코드를 뜯어보고 하는거더라고요.

사실 앤서블도...랩을 한 천번은 돌려본거 같아요....
각설하고, k8s로 랩을 일단 아주아주아주 draft로 자동으로 만드는걸 우선 짰어요.

이게 곧 또 바뀔 가능성은 10000% 입니다. :)
개선할 것도 많고, 공부하면서 추가 변경 될꺼거든요.

그럼에도 공개하는 이유는...당장 이게 도움이 될수도 있지 않을까 해서요.

코드는 여기에 있습니다.
https://github.com/sysnet4admin/PRJ_DevOps/tree/master/0.All_inOne_k8s

그리고 virtualbox와 vagrant를 설치하고 vagrantfile이 있는 곳에서 vagrant up만 실행하시면 아래와 같은 결과가 나오고


아래와 같은 랩이 완성 됩니다~!


실제로 Master node에 접속해서 kubectl get nodes를 실행하면 다음과 같이 나옵니다.  :)


이건 이제 시작이겠죠!!
열심히 공부해서 더 나은 내용들을 채우겠습니다.

조훈 드림.


[Continue reading...]

2019년 8월 20일 화요일

[정보] 외국 자격증 PDF 버전으로 받는법

- 0 개의 댓글

Hi Team,

Here is the information for download the certification PDF version.
Hopefully it will help to you. 


1. Microsoft


    It could be download from those link. Thx Chae  
    There is no way to free download
    Only pay to download.
       
  
   Well I think it Is not easy to do..and..it needs? HaHa…if you need or request to this, please search and make your ~ own.

[Continue reading...]

2019년 6월 20일 목요일

[net] SACK (SelectiveAcknowledgements)

- 0 개의 댓글
안녕하세요

나중에 또 필요해서 찾아볼꺼 같아서 정리해 둡니다 :) 

이중에서 특히 wireshark 옵션 같은 경우는 필요한 경우가 많을 것 같아요~!

[ Wireshark로 옵션이 적용된 패킷이 있는지 확인 ]

아~~~ 무 것도 없어요 실제로 Packet이 문제가 있어서 다시 ack 한 것들을 봐도 없어요~!


적용되어 있다면, 이렇게 안 나오겠죠?

[ SACK이 적용되어 있다면? ]


=============
  1. [한글] 오리님의 소중한 자료 ( http://blog.naver.com/PostView.nhn?blogId=goduck2&logNo=221214619048 )
  2. [한글] 구체적으로 분석된 자료 ( https://mr-zero.tistory.com/36 )
  3. [영문]자료 ( http://packetlife.net/blog/2010/jun/17/tcp-selective-acknowledgments-sack/ )
  4. [영문] 와이어샤크에서 SACK에 대해서 확인할 수 있는 옵션 참로 ( https://www.wireshark.org/docs/dfref/t/tcp.html )
  5. [영문] SACK 자체에 대한 구체적인 설명 ( https://wiki.geant.org/display/public/EK/SelectiveAcknowledgements )

==============
[Continue reading...]

2019년 6월 14일 금요일

[Ansible] Distro List

- 2 개의 댓글
오~오~ 랜만입니다. :)
아주 간단한 업데이트를 하려고요.

앤서블 2.8.0 버전 기준에서의 OS를 구분할때 사용되는 리스트 입니다~!

[vagrant@ansible-svr4nxos distro]$ ansible --version
ansible 2.8.0
  config file = /etc/ansible/ansible.cfg
  configured module search path = [u'/home/vagrant/.ansible/plugins/modules', u'/usr/share/ansible/plugins/modules']
  ansible python module location = /usr/lib/python2.7/site-packages/ansible
  executable location = /usr/bin/ansible
  python version = 2.7.5 (default, Oct 30 2018, 23:45:53) [GCC 4.8.5 20150623 (Red Hat 4.8.5-36)]

Location:
 - /usr/lib/python2.7/site-packages/ansible/module_utils/distro/_distro.py

 177 def id():
 178     """
 179     Return the distro ID of the current distribution, as a
 180     machine-readable string.
 181
 182     For a number of OS distributions, the returned distro ID value is
 183     *reliable*, in the sense that it is documented and that it does not change
 184     across releases of the distribution.
 185
 186     This package maintains the following reliable distro ID values:
 187
 188     ==============  =========================================
 189     Distro ID       Distribution
 190     ==============  =========================================
 191     "ubuntu"        Ubuntu
 192     "debian"        Debian
 193     "rhel"          RedHat Enterprise Linux
 194     "centos"        CentOS
 195     "fedora"        Fedora
 196     "sles"          SUSE Linux Enterprise Server
 197     "opensuse"      openSUSE
 198     "amazon"        Amazon Linux
 199     "arch"          Arch Linux
 200     "cloudlinux"    CloudLinux OS
 201     "exherbo"       Exherbo Linux
 202     "gentoo"        GenToo Linux
 203     "ibm_powerkvm"  IBM PowerKVM
 204     "kvmibm"        KVM for IBM z Systems
 205     "linuxmint"     Linux Mint
 206     "mageia"        Mageia
 207     "mandriva"      Mandriva Linux
 208     "parallels"     Parallels
 209     "pidora"        Pidora
 210     "raspbian"      Raspbian
 211     "oracle"        Oracle Linux (and Oracle Enterprise Linux)
 212     "scientific"    Scientific Linux
 213     "slackware"     Slackware
 214     "xenserver"     XenServer
 215     "openbsd"       OpenBSD
 216     "netbsd"        NetBSD
 217     "freebsd"       FreeBSD
 218     ==============  =========================================


Windows는 있긴 한데...예제가 없습니다. windows의 facts를 수집해 보고 해당 값을 넣어 일일히 테스트해 봐야 합니다.

windows facts를 찾는건 아래의 내용을 참고하세요
https://stackoverflow.com/questions/38962577/ansible-get-facts-from-remote-windows-hosts

Location:
 - /usr/lib/python2.7/site-packages/ansible/modules/windows/setup.ps1

202     $ansible_facts += @{
203         ansible_distribution = $win32_os.Caption
204         ansible_distribution_version = $osversion.Version.ToString()
205         ansible_distribution_major_version = $osversion.Version.Major.ToString()
206         ansible_os_family = "Windows"
207         ansible_os_name = ($win32_os.Name.Split('|')[0]).Trim()
208         ansible_os_product_type = $product_type
209     }
210 } 
[Continue reading...]

2019년 2월 20일 수요일

[자격증] 갱신 정보 (2019.02.20 updated)

- 0 개의 댓글
안녕하세요

이게 얼마만에 글인지 ㅠㅠ
요즘 벌려 놓은 일 자체도 많지만...일을 더 벌리고 있어서;;; 하하

이번 주제는 자격증 갱신 정보입니다.
최근에 RHCE 시험을 치뤘는데 -_- 치려고 보니 RHCAS가 3일 이후에 expire된다고 하더라고요...

그래서 이런 정보들은 좀 종합해 볼 필요가 있을 것 같아서 정리해 보았습니다 :)

계속 업데이트 예정이니~~! 궁금한 내용이 있으면 이 게시물을 참조하시면 될 것 같아요~

1. VMware 
얼마전에 VMware로 부터 이런 메일이 왔었죠
대략 보면...응? 2019년 2월 5일부터 2년 내에 다시 자격증을 갱신해야 되는게 없어진다구?

Changes to VMware Recertification Policy – Removal of 2 Year Requirement
As of February 5, 2019, VMware Certification will no longer have a mandatory recertification requirement. Now, you have the choice of when to recertify, rather than be required to do so every two years.

Certifications will still retire, so recertification is important to:
  • Validate your expertise in the latest VMware products
  • Show relevancy in the market by holding up-to-date certifications
  • Receive the full benefits of VMware certification
The video below, along with the FAQ have been created to help you understand more about why VMware made this decision. If you have additional questions, please email us atcertification@vmware.com.

Download the FAQs

그렇습니다. 없어진답니다. 사실 2년에 한번씩 갱신하는건 어~~~엄청 부담이죠~~

그래서 자세히 읽어보려고 FAQs를 들어가 봅니다.
그리고, 많은 내용 중에 주요 key (우리의 자격증은 어디로?)를 살펴 보겠습니다.


자 위의 자격증들이 4월부터 active로 변경됩니다!!

아자아자 짤에 대한 이미지 검색결과

왜 이렇게 바뀌었을까요~?
하고 싶은 말은 많으나 이 이미지로 대체하겠습니다.~!
뱁새 가랑이에 대한 이미지 검색결과

참...vcp4와 같이 오래된건 안되요~~

참고로 제꺼 현재 상태이고, 저기 vcp5와 6이 active로 올라오게 되겠네요~!

자격증 정보 링크:
https://www.certmetrics.com/vmware/


담당자정보 (아무때나 연락하는게 아니라 자격증 관련하여 심각한 이슈일때 연락입니다.)
  • 임푸르뫼 PuReuMoe Im
  • VMware Education Sales Admin/ 담당
  • pim@vmware.com


2. Redhat 
자 레드햇은 말이죠..먼 옛날...Major 번호가 2차례 올라가면 expire한다고 했는데...
요즘은 3년으로 바뀌었답니다. (정책이 자주 바뀌는 편이라 앞으로 어떻게 될지 모르겠네요)


Redhat 자격증 verification link
https://www.redhat.com/rhtapps/services/verify


Redhat 자격증 리뉴얼
https://www.redhat.com/en/services/certification/renewal


RHCSA is the core of all of our system administration credentials.
Keep your RHCSA current by completing one of the following:
Note: Earning your RHCE—or another eligible credential—moves the non-current date for your RHCSA out to 3 years from the date on which the additional credentials were earned. This does not keep your RHCSA in Red Hat OpenStack® and RHCE in Red Hat OpenStack current. (See below.)
Keep your RHCE certification current by completing one of the following:
Note: Earning additional credentials beyond RHCE moves the non-current date for both your RHCE and RHCSA out to 3 years from the date on which the additional credentials were earned. This does not keep your RHCSA in Red OpenStack and RHCE in Red Hat OpenStack current. (See below.)
이를 쉽게 설명하자면, 땄던 자격증을 다시 따던지, 아니면 RHCA 과목 중에 하나를 pass하시는 뜻입니다. 
그렇다면, RHCA를 따려면? 아래의 리스트를 참조하시면 될 것 같습니다.
https://www.redhat.com/en/services/certification/rhca

To attain and maintain RHCA status, an RHCE must pass at least 5 of the following exams and keep the associated certifications current:
To attain RHCA status, an RHCEMD or RHCJD must pass at least 5 of the following exams and keep the associated certifications current:
담당자정보 (자격증 관련 문의는 아래의 링크를 이용하도록 되어 있네요)
https://www.redhat.com/rhtapps/services/comments/ 

3. Cisco 
시스코는 CCNA와 CCNP는 3년 주기로 Certification을 관리하여 CCIE는 2년 주기로 관리합니다. 다만 CCIE를 기간내에 1회더 취득하면 2년 정도가 더 붙어서 총 4년내에는 안심? 하셔도 됩니다~~!

Recertification Renewal Timeframes

CertificationDuration
Entry-level, Associate-level, and Professional level3 years
All CCIE certifications2 years
Specialist certifications2 years
Cisco Certified Architect5 years


자격증 정보 확인 (CCIE Tracker)
https://ccie.cloudapps.cisco.com/CCIE/Schedule_Lab/CCIEOnline/CCIEOnline


담당자정보 (자격증 관련 문의는 아래의 링크를 이용하도록 되어 있네요)
https://ciscocert.secure.force.com/english


계속 업데이트 해 볼께요 이건~
빠잉


[Continue reading...]
 
Copyright © . 쿠버네티스 전문가 블로그 - Posts · Comments
Theme Template by BTDesigner · Powered by Blogger